
August 4th, 2026
Suspension is the part of the vehicle most exposed to water, salt and grit, which is why it’s the section every workshop reaches for grease first. But a fair chunk of the system is actively damaged by that instinct. This guide covers the widely misunderstood ‘should I grease this’ cases (bushings and brake slide pins chief among them), plus the dissimilar-metal and galvanic issues most services skip.
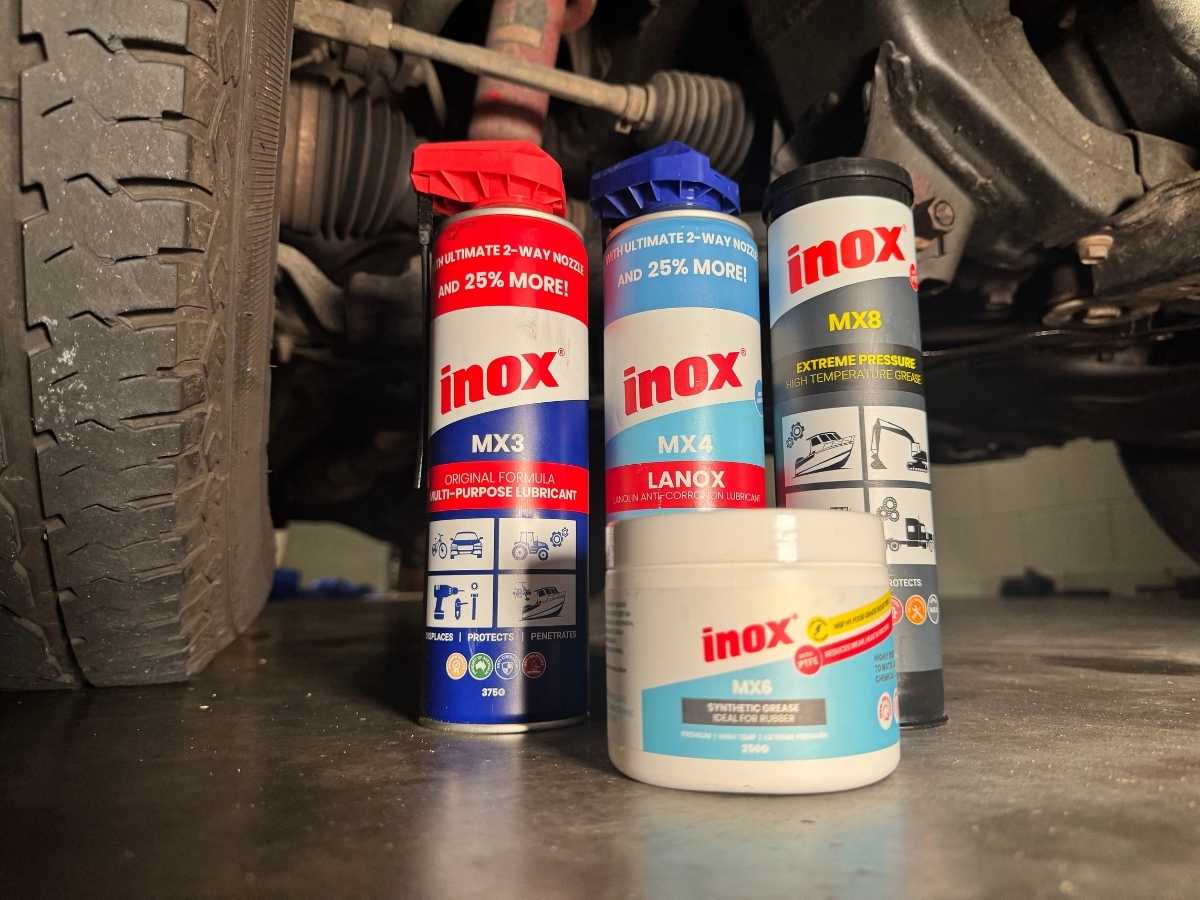
The product cheat sheet
INOX MX3 Lubricant is a penetrant and water-displacer for freeing corroded fasteners, with no load-bearing role, so treat it as a prep step. LANOX MX4 (liquid) and LANOX MX4G (heavier, stay-put) are lanolin-based, for external metal protection rather than interleaf or internal bushing contact. INOX MX6 Food Grade Grease is rubber and O-ring safe where that matters; it’s clay-based, so never mix it with lithium or calcium greases on the same point. INOX MX8 Extreme Pressure Grease is the lithium complex EP grease for wheel bearings, chassis nipples and coilover threads. INOX MX11 Chain & Brake Cleaner is a residue-free prep cleaner, not a lubricant, and INOX MX12 PTFE Supa Glide is the dry-film answer where grease attracts grit.
Component application guide
Fasteners, shackles, U-bolts and hangers: INOX MX3 Lubricant frees the fastener first, and dwell time matters more than technique here. Give it 20 to 30 minutes minimum on a standard seized bolt, and leave it overnight on anything badly corroded, before you reach for heat or impact. Once the fastener’s out, cleaned up and torqued back up, LANOX MX4 goes on externally only, as it’s a corrosion barrier in this application. While you’re in there, it’s worth checking U-bolts for corrosion-driven elongation and cracking as well, not just tightness, since a stretched or hairline-cracked U-bolt can pass a torque check and still be a rejection.
On leaf-sprung setups specifically, the same logic applies at the shackle end: INOX MX3 Lubricant frees seized shackle pins and equaliser bolts, and LANOX MX4 protects the spring eyes and hanger brackets externally afterwards. Worth a quick note here, since it trips up more shops than it should: grease has no place between the leaves themselves. It interferes with the pack’s own interleaf friction, which many multi-leaf designs rely on for damping, and it collects grit into an abrasive paste over time rather than protecting anything. The one exception is wet bolts and equalizers fitted with a grease nipple; those are sealed, purpose-built points meant to be greased, and INOX MX8 Extreme Pressure Grease is the right product for them.
Metal chassis bushes: INOX MX8 Extreme Pressure Grease is the standard choice for metal-on-metal bushes at high-load chassis points, holding up under the vibration and water exposure these components face daily. INOX MX6 Food Grade Grease steps in wherever the same joint also needs rubber or O-ring compatibility, since its clay-based formulation is safe on those materials in a way general EP greases aren’t. The two other bush types on a suspension system run to different rules entirely: rubber-bonded bushes stay completely dry, since the press-fit relies on friction rather than lubrication to stay locked in the arm, and polyurethane bushings want a dedicated silicone-based grease rather than either of the products above, because they physically slide against their sleeve in a way rubber bushes don’t.
Ball joints, tie-rods and CV-style boots: INOX MX3 Lubricant, MX3FG, LANOX MX4 and MX5 can be used on most man-made rubbers, including silicone, Viton and harder synthetics. But since these products all contain mineral oil, they’re not intended for direct application onto rubber seals or boots. Repeated or long-term soaking can soften natural or porous rubber over time, though incidental overspray during a normal service is fine as long as the excess gets wiped off rather than left to sit. INOX MX3 Lubricant’s proper role here is on the exposed fastener threads during removal and refitting, not the joint or boot itself. On sealed, non-serviceable joints, a torn boot is generally the usual replace-now call rather than something to re-grease, simply because there’s no way to purge whatever’s got in through the tear.
There’s one detail worth double-checking before you reach for any lubricant near these joints: plenty of modern ball joints and tie-rods are torque-to-yield, meaning the spec is given as a torque figure plus additional degrees of rotation rather than a straight number. Lubricating a stud or taper that’s spec’d for dry torque changes the clamping force you actually achieve once it’s done up, which can leave the joint under- or over-tensioned. It’s worth confirming the service data before applying anything to a stud or taper, rather than assuming it’s the same as the last one that came through on the hoist.
Coilover and adjustable-suspension threads: a light film of INOX MX8 Extreme Pressure Grease on cleaned collar threads is the standard fix here, and the spray format works well for getting an even coat into the thread pitch without pulling the collar apart. The part that’s easy to skip, and the one that actually causes most of the trouble, is cleaning grit out with a brush or air line before adjusting or re-greasing. That step matters more in practice than the obvious steel-body-aluminium-collar galvanic pairing, since it’s the most common cause of seized collars on the bench. The two issues compound each other too: the pairing gives you a baseline for corrosion, and grit locking the thread pitch mechanically makes it worse again. Once you’ve adjusted, wipe off the excess grease rather than leaving it proud, or the open pitch just grinds whatever dirt it picks up into itself the next time someone winds the collar.
Dissimilar-metal joints on aluminium control arms: forged aluminium arms paired with steel-sleeved bushings or steel fasteners are increasingly common on modern utes and 4WDs, and everyone in the trade already knows steel-on-aluminium under road salt exposure is a galvanic risk. What’s less obvious is that copper anti-seize, the default reach on most benches for exactly this kind of job, is actually the wrong call here. Copper is more noble than aluminium in the galvanic series, so rather than protecting the joint it accelerates the aluminium’s corrosion once the two are in contact. An aluminium or nickel-based anti-seize is the safer choice at the thread contact instead. LANOX MX4 plays a complementary role on top of that, applied as an external barrier across the bracket or fastener interface after assembly, working alongside the correct anti-seize at the thread rather than replacing it.
Air suspension linkages: the overlooked failure point on these systems isn’t the bellows, it’s the height-sensor linkage pivots. These corrode and seize over time, and once they do, the system reads the wrong ride height and throws up lean or ride-height faults that can look like a bigger problem than they are. This is a documented OEM issue rather than a rare fault, so it’s worth checking these pivots as a matter of course rather than only when a fault code sends you looking. INOX MX5 Lubricant goes on the linkage ball-stud pivots to keep them free, with air lines and the bellows itself masked off during application, since neither should ever be treated unless the manufacturer specifically says so.
Brake caliper slide pins: these call for INOX MX6 Food Grade Grease, chosen specifically for its no-melt, rubber-safe formulation rather than as a general-purpose pick. Standard chassis grease and general EP greases can migrate or affect the slide-pin boot once they’re exposed to sustained braking heat, which is exactly why MX6’s clay base and rubber compatibility make it the right fit for this particular job. The process matters as much as the product: use INOX MX11 Chain & Brake Cleaner first to get the pin and bore completely residue-free, then apply INOX MX6 Food Grade Grease as a thin film only. Over-packing the bore risks hydraulically locking the pin in place rather than letting it slide freely, which defeats the purpose of greasing it in the first place.
Pro workshop upgrades
Most shops already run Clean, Inspect, Lubricate in some form, but it’s worth making it a genuinely fixed sequence rather than lubricate-then-inspect out of habit, since grease over an unseen crack or crevice-corrosion site hides the exact fault you needed to catch. Less obvious: treat penetrant dwell time as a billable step, not a delay you’re eating into the job. INOX MX3 Lubricant needs real contact time to work, 20 to 30 minutes minimum on a normal seized fastener and overnight on anything badly corroded, before heat or impact comes into play; rushing this step, not the corrosion itself, is the leading cause of snapped fasteners on the hoist. Pre-treat new components before assembly too, since control arms, brackets and fasteners benefit from LANOX MX4 straight after unboxing, when protection is most effective, rather than waiting until a fault shows up down the track.
Run a galvanic-junction check as a line item on aluminium-suspension vehicles, flagging aluminium-to-steel contact points for the correct anti-seize plus an external LANOX MX4 barrier. Swap wet grease for INOX MX12 PTFE Supa Glide in high-dust 4WD applications, on sway-bar linkages, dusty coilover collars and any wet-grease point turning into grinding paste. And before any chassis cavity wax job near suspension mounts, confirm the cavity is clean and dry, since sealing in trapped moisture accelerates the decay you’re trying to stop.
Building the hierarchy into your workflow
The pattern: MX3 frees, LANOX MX4 protects externally, MX8 carries load at designed grease points, MX11 preps brake surfaces, and MX12 replaces grease where dust is the enemy. Then there are the exceptions worth knowing cold: rubber-bonded bushes, brake slide pins and leaf-pack interiors each call for a different product entirely, or no lubricant at all.